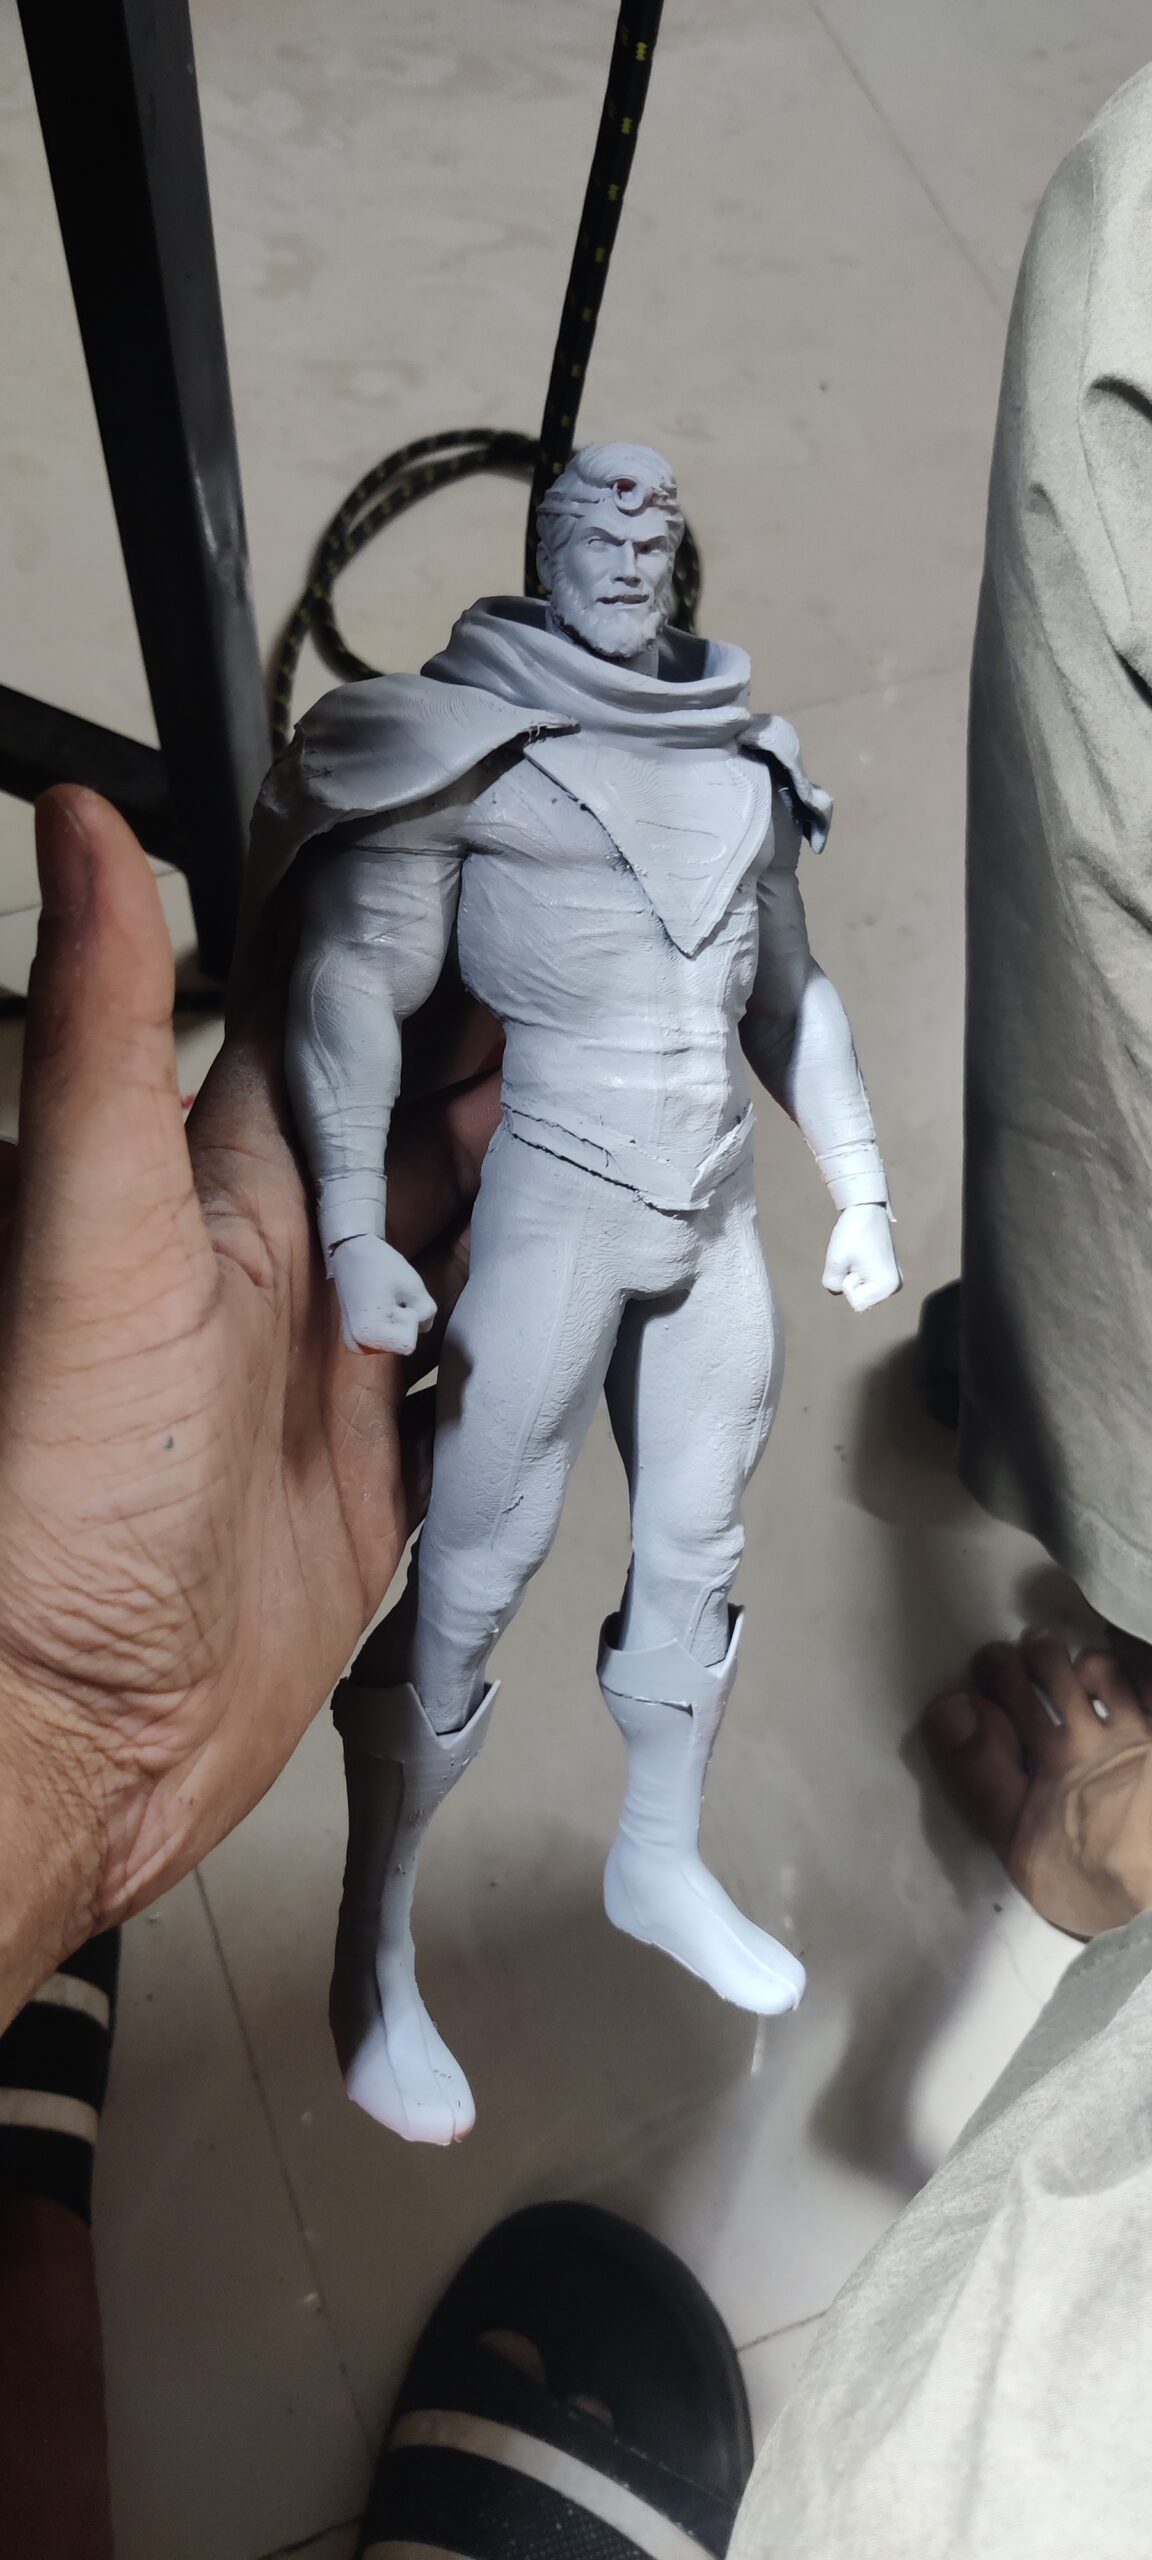
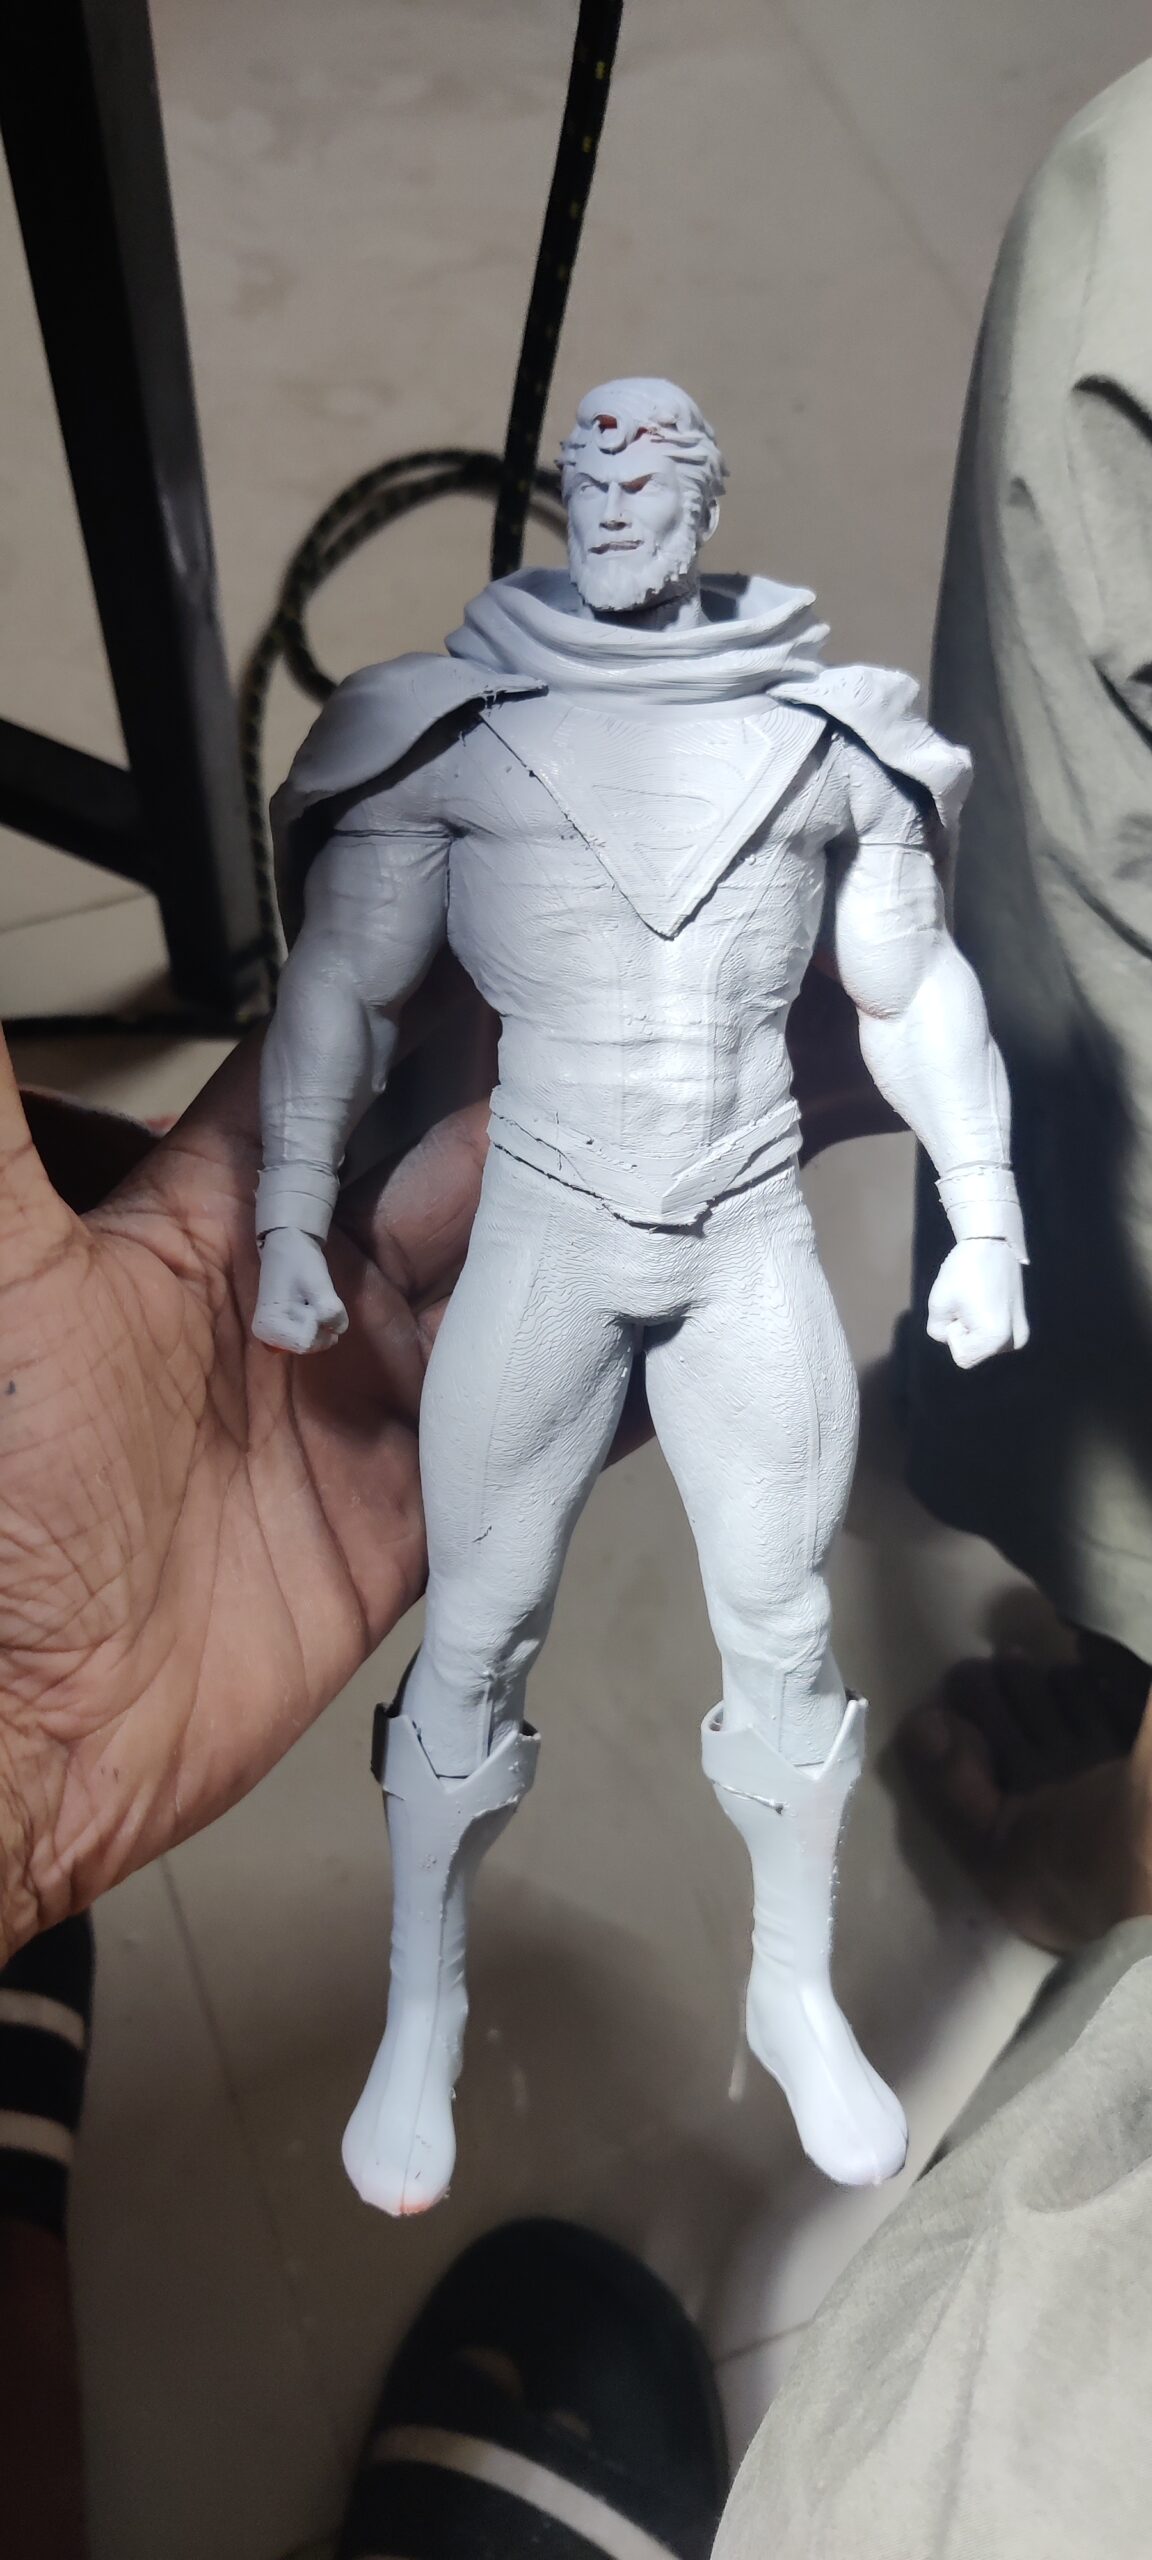
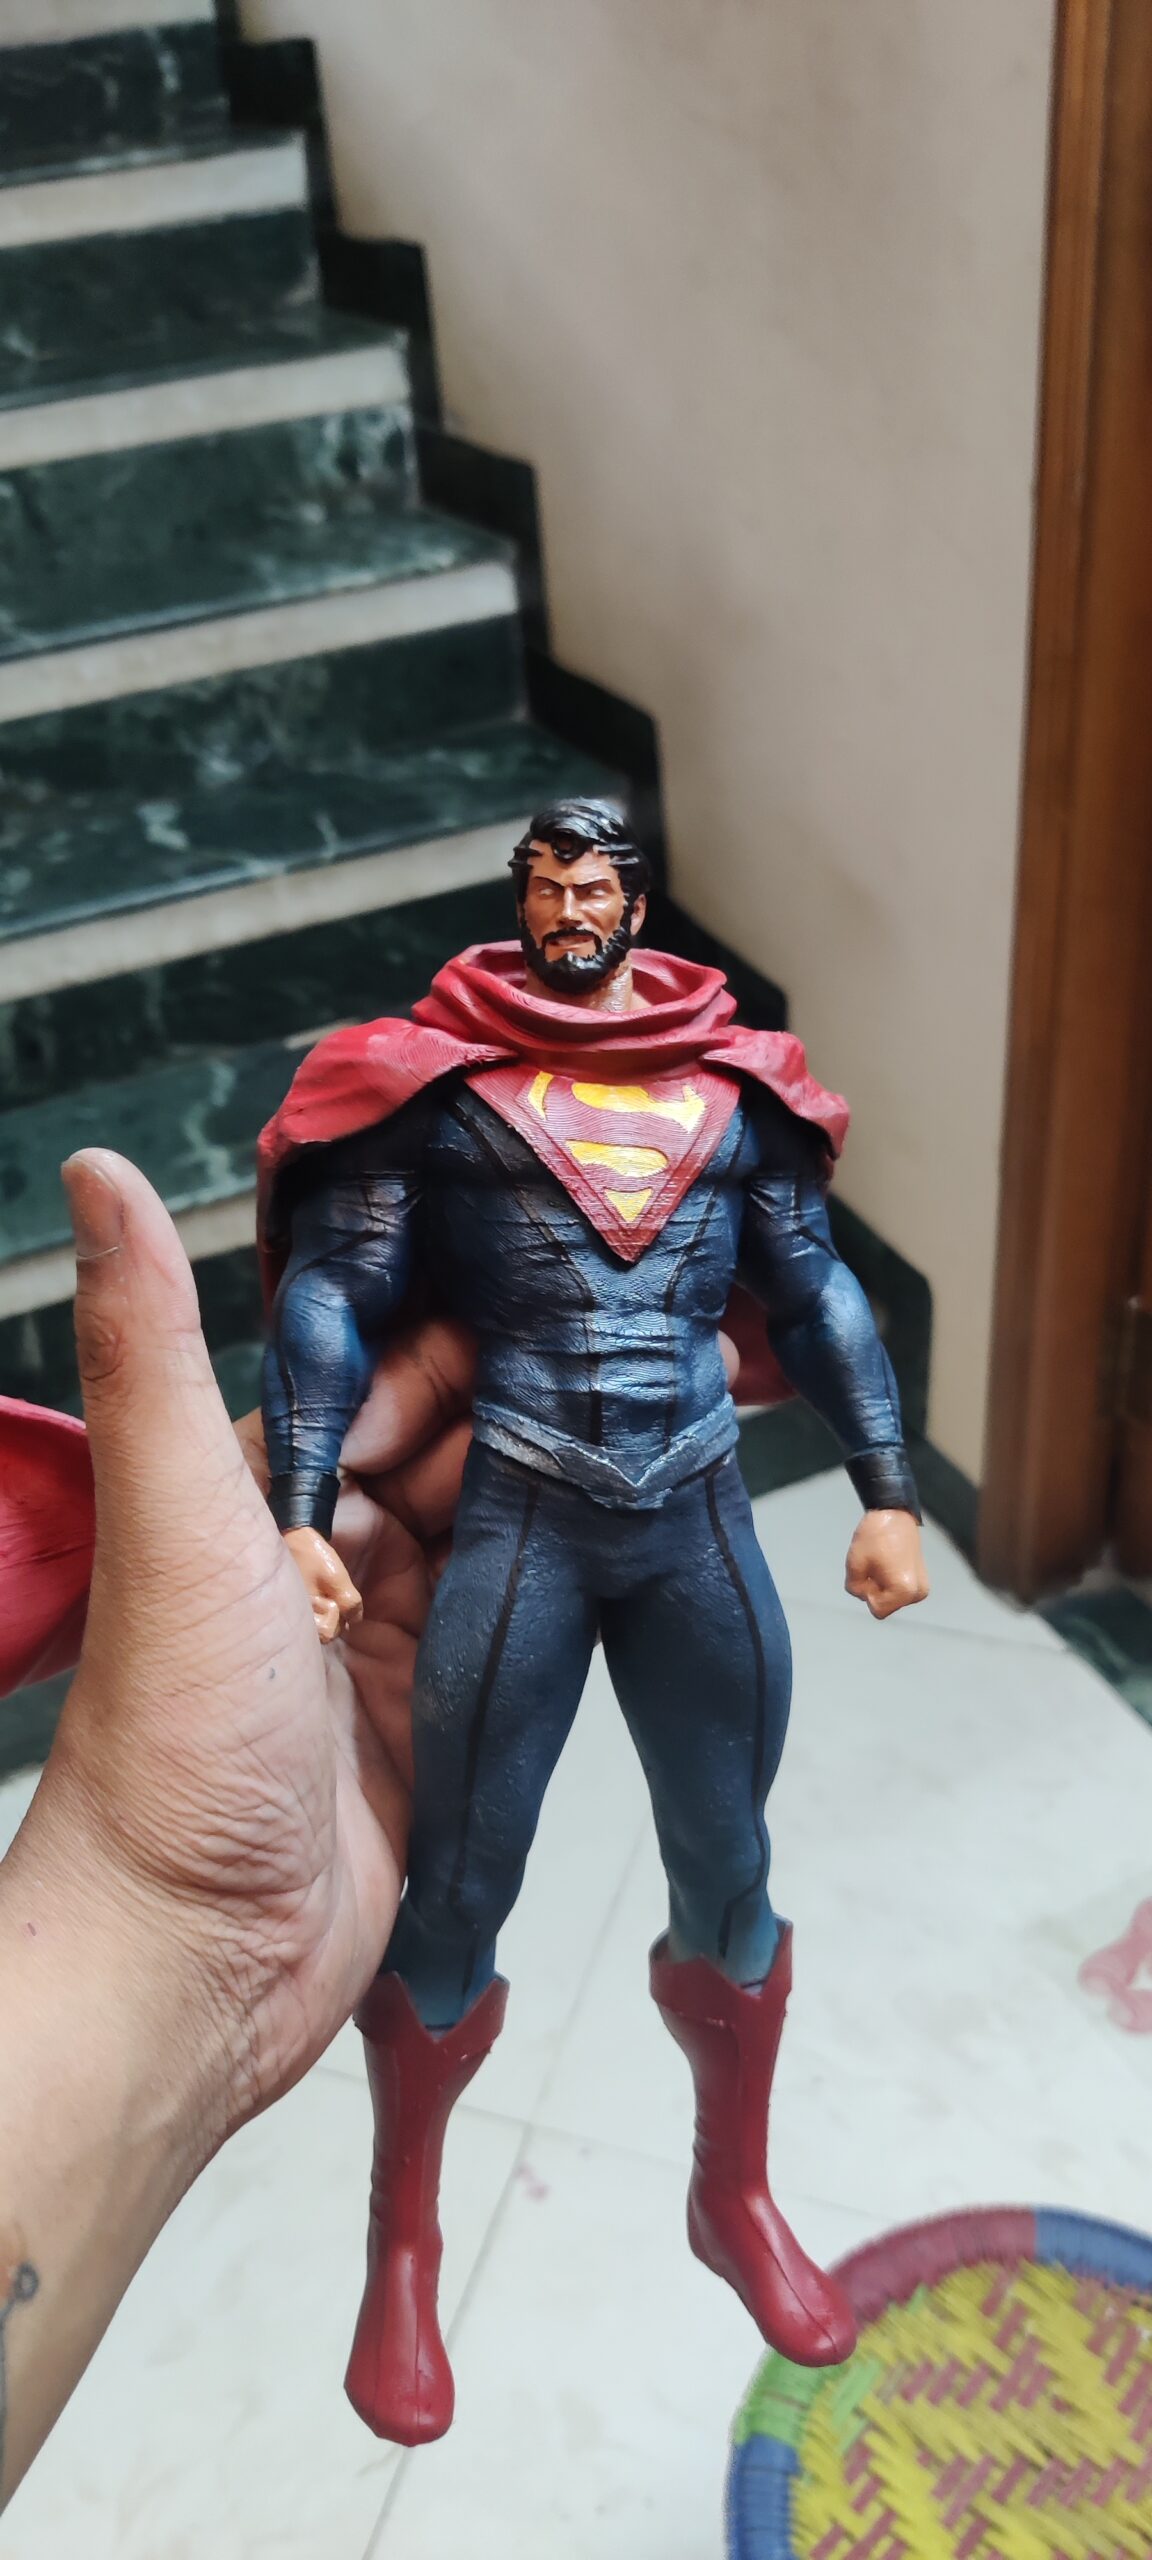
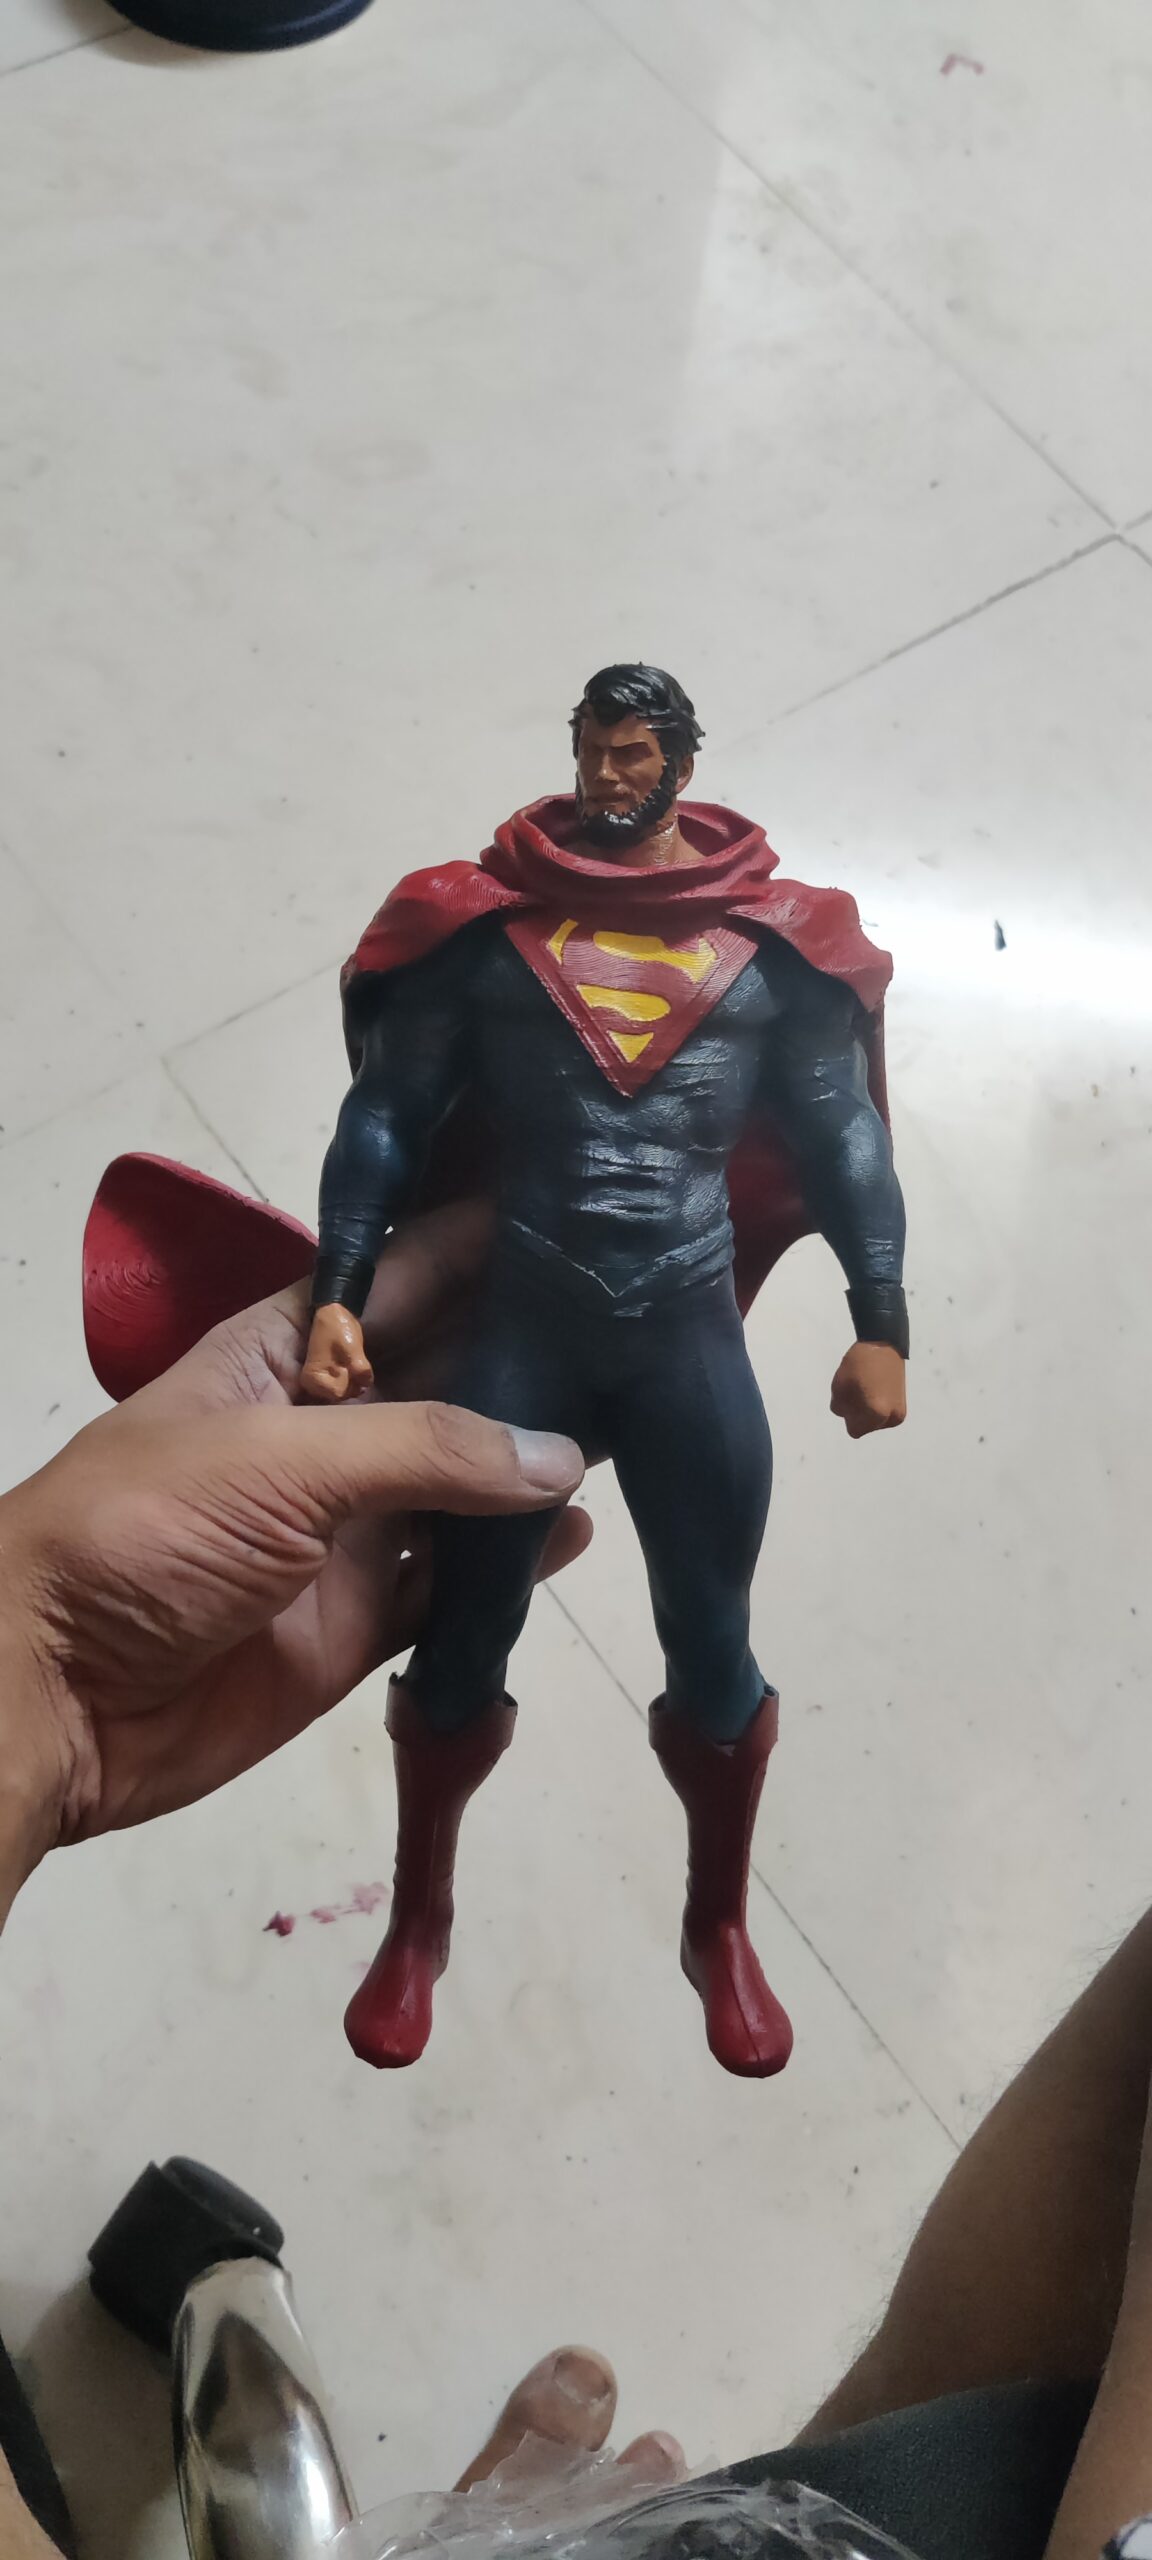
Okay, so this Superman model was one of my first big 3D prints. I was really excited to tackle such an iconic character, but I quickly realized that things weren’t going to be as easy as I thought. The first problem I ran into was the quality of the print. It was a bit janky, to be honest. There were a lot of imperfections that I had to spend hours polishing. It was a pain, but I knew it was necessary to get a decent finish.
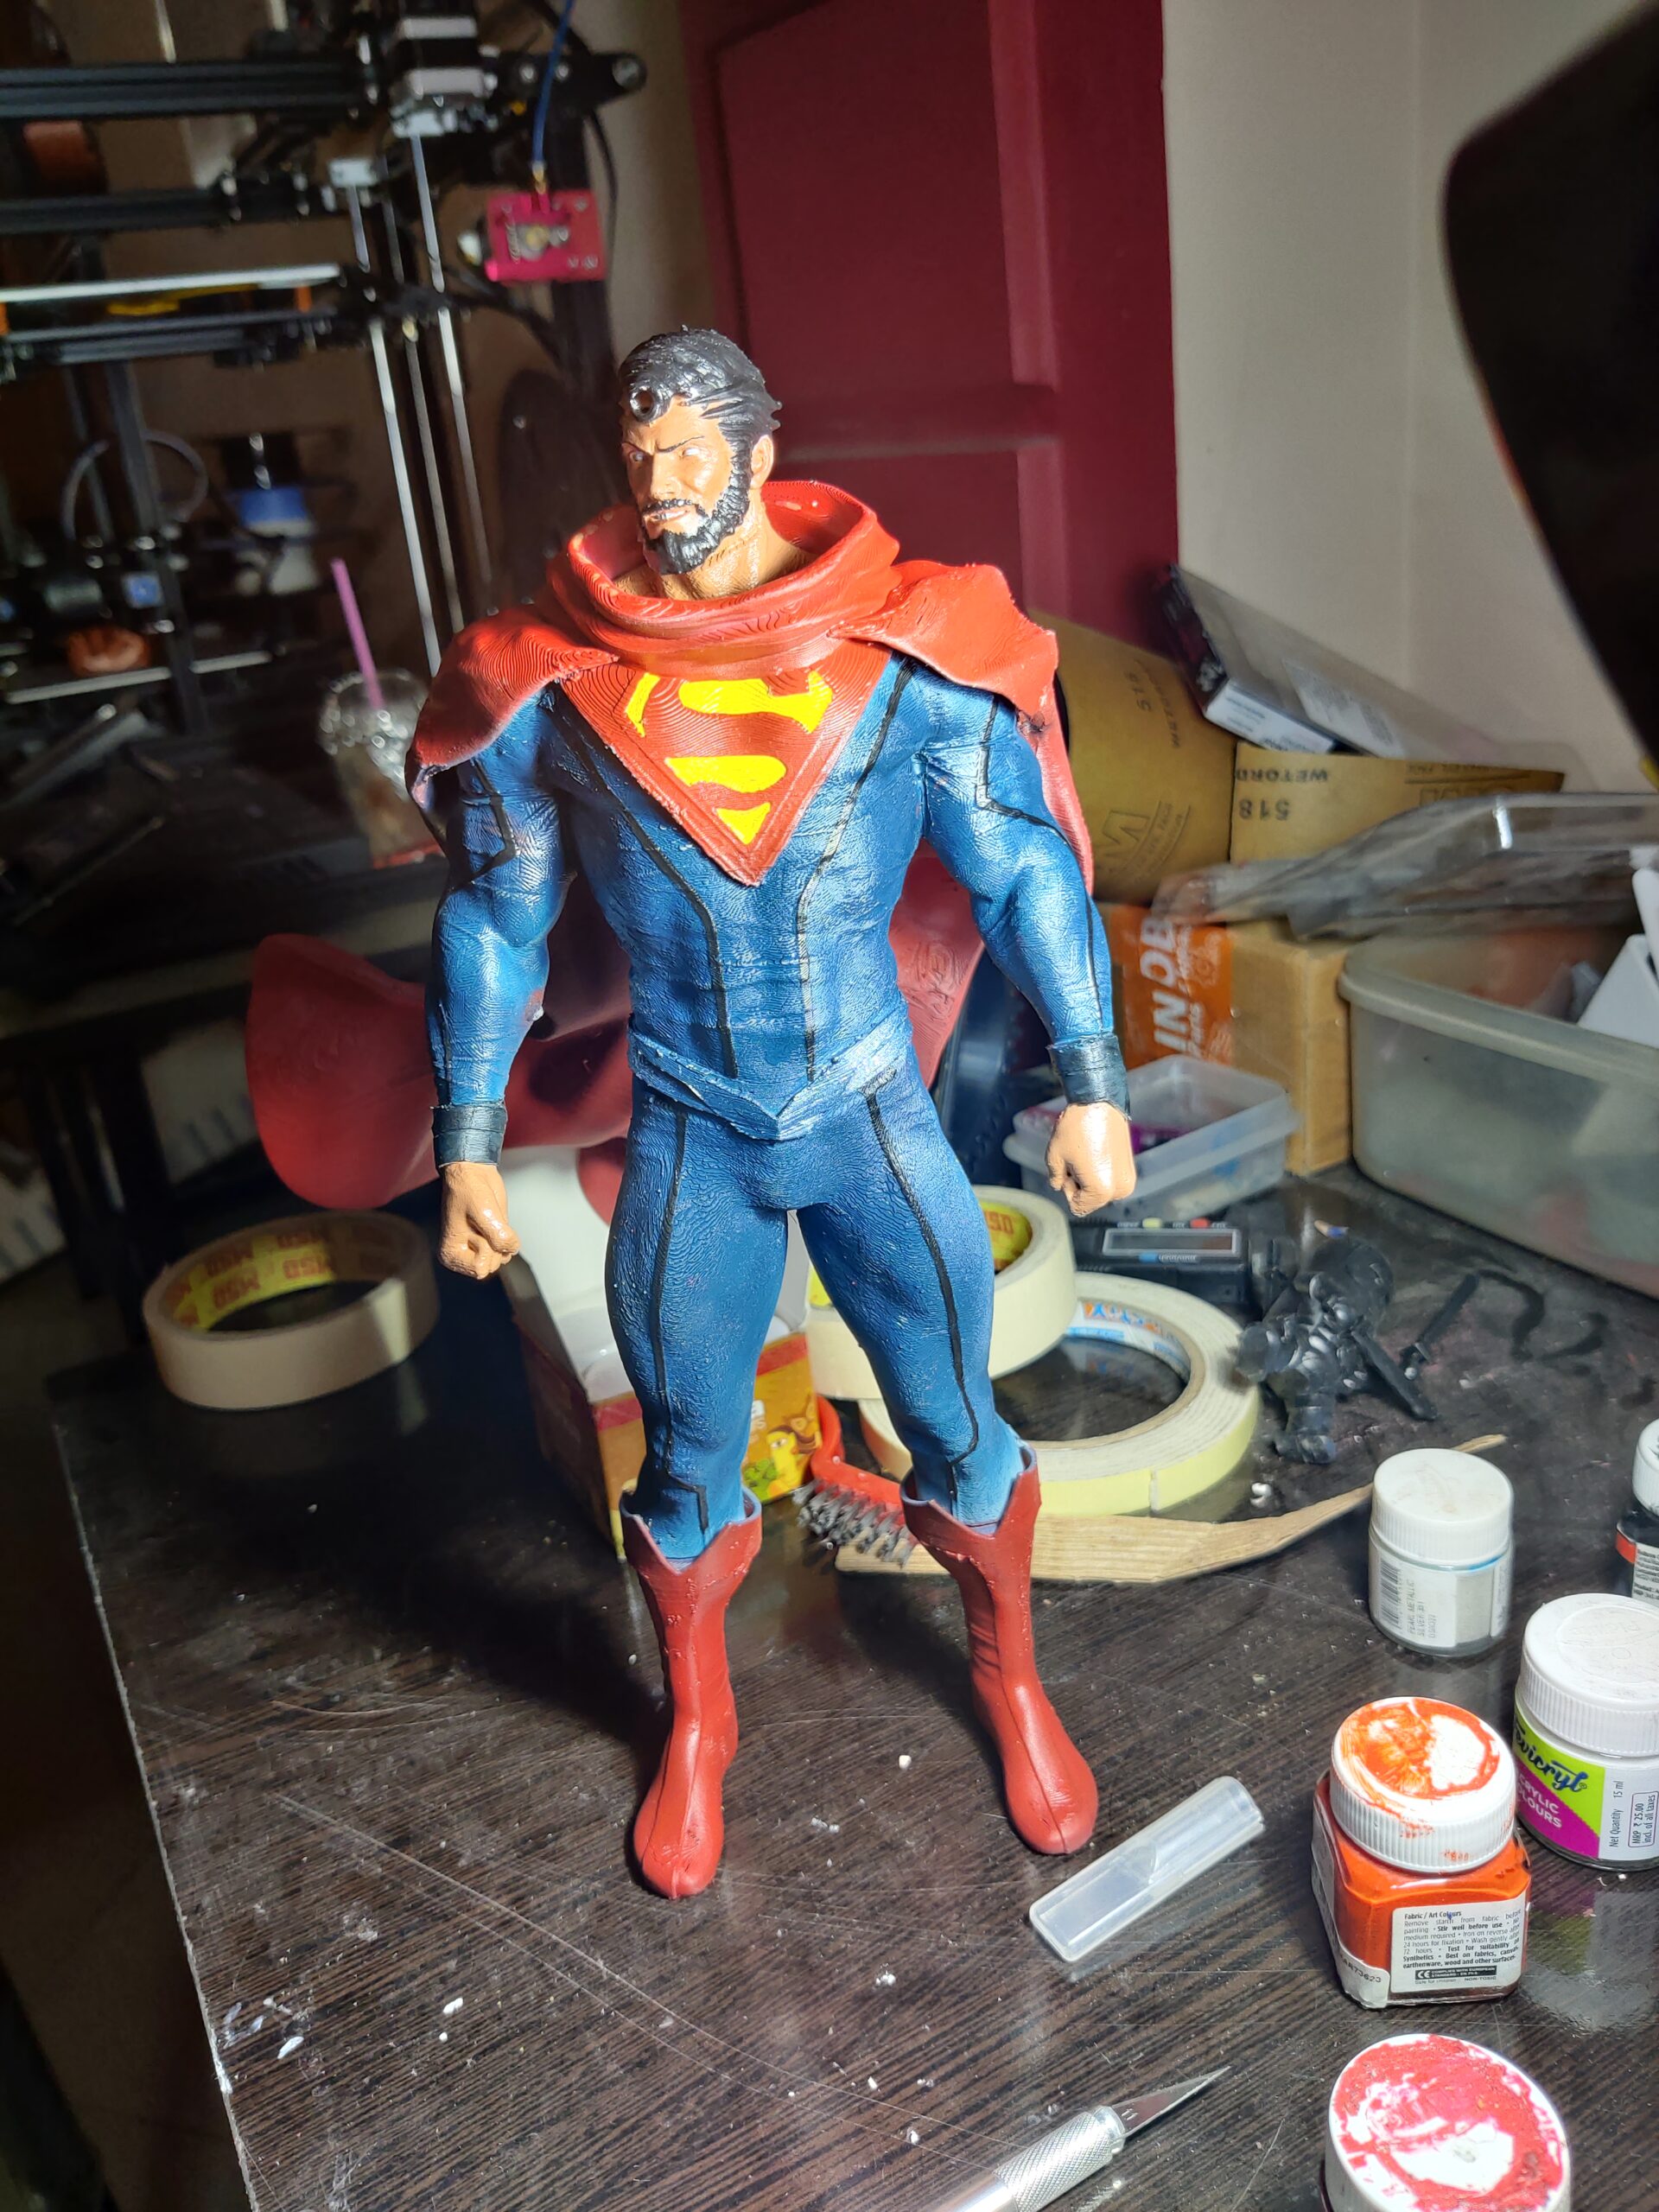
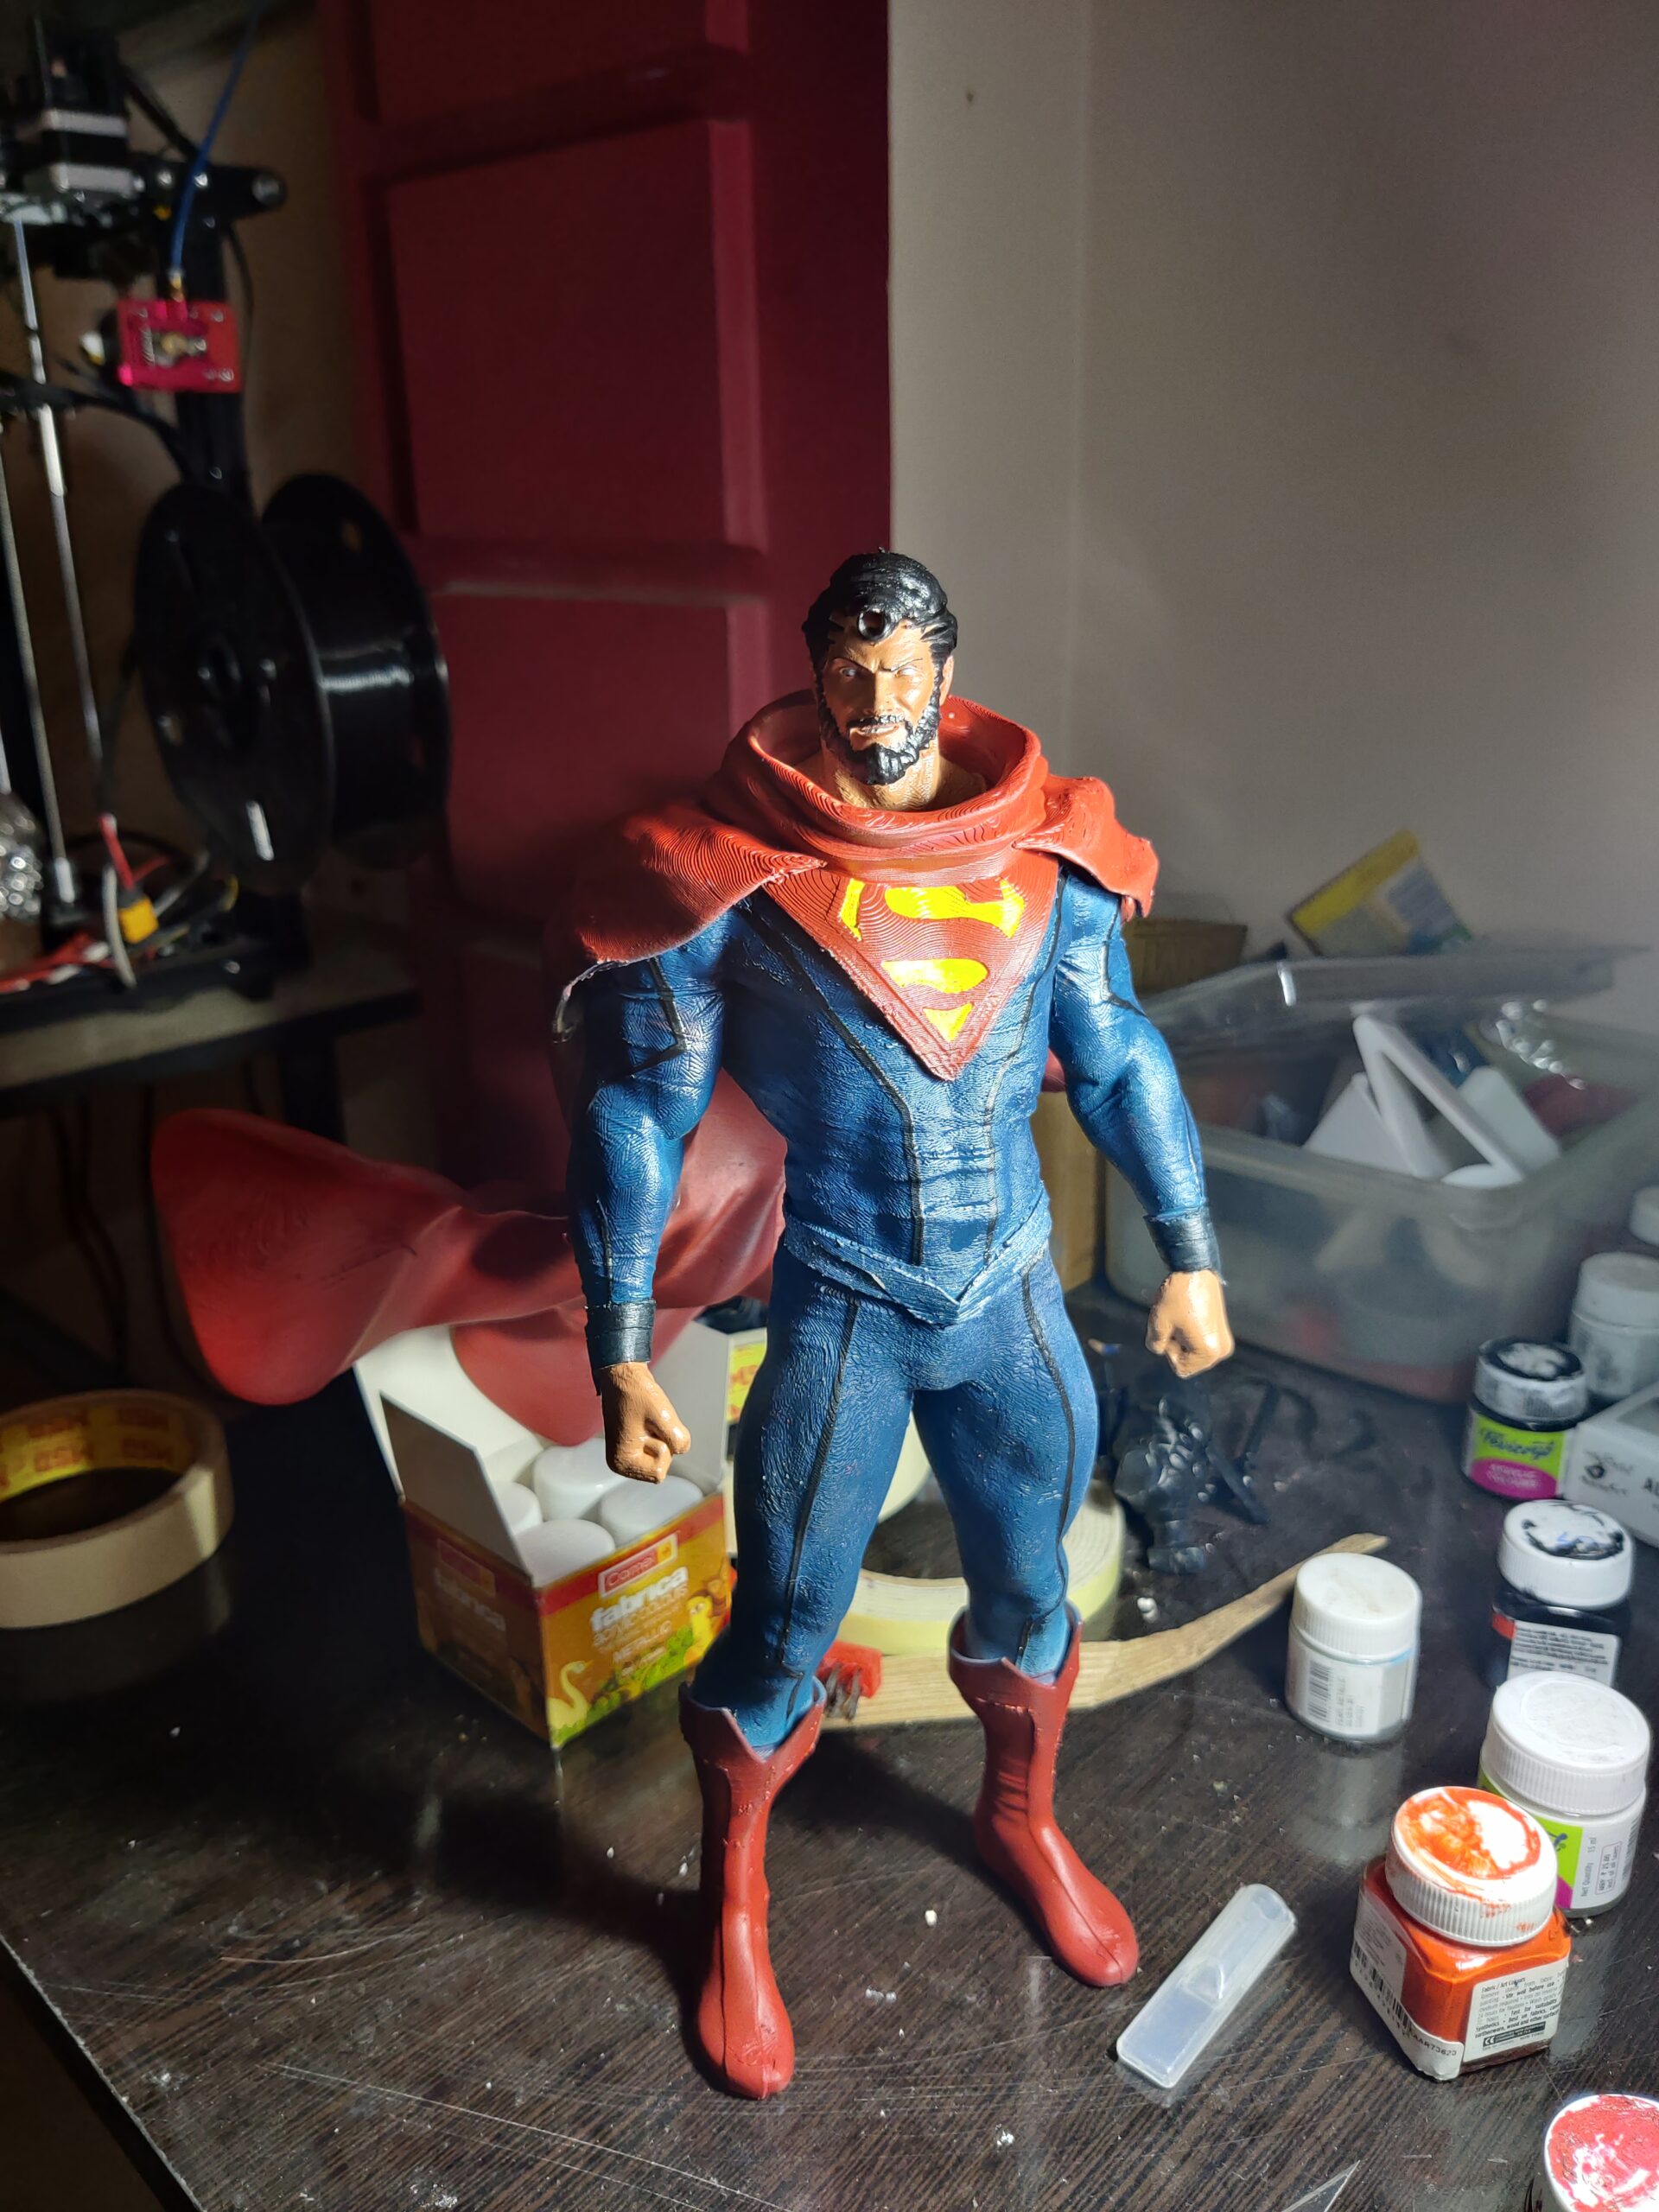
The Man of Steel
Another issue was the cape. It was split into four or five parts, which made it a real challenge to assemble. I had to manually fix the seams after printing, and it took forever. To join the body parts, I used a combination of super glue and resin. This gave me a strong and durable bond that could withstand the weight of the model. For the cape, I used a soldering iron to weld the pieces together. It was a bit tricky, but I managed to get it done.

One thing that I’m really happy about is that I tried Korubushi primer spray for the first time on this project. It’s an amazing product! It fills in all the gaps and imperfections, and it creates a smooth, even surface for painting. I highly recommend it to anyone who does 3D printing. In total, this Superman model took me about two to three weeks to complete, including the print time. I was commissioned by Sonali, and I charged her around 4k for the model. It was a good learning experience, and I’m definitely proud of the final result.